> For the complete documentation index, see [llms.txt](https://docs.fiammalabs.io/llms.txt). Markdown versions of documentation pages are available by appending `.md` to page URLs; this page is available as [Markdown](https://docs.fiammalabs.io/our-product-suite/pragmatically-trustless-bitvm-bitcoin-bridge/user-guides/testnet-alpha/how-to-deposit-and-withdraw-on-fiamma-bridge.md).
# How to Deposit and Withdraw on Fiamma Bridge?
Prerequisite
To begin, you'll need wallets that support EVM-compatible and BTC addresses, along with the corresponding test tokens.
* Bitcoin Signet
* Wallet: [Unisat](https://unisat.io/) (others coming soon)
* Faucet:
* Ethereum Holesky Testnet
* Wallet: [Metamask](https://metamask.io/) and others
* Faucet:
## How to Deposit
> Transfer sBTC from Signet to Holesky Testnet.
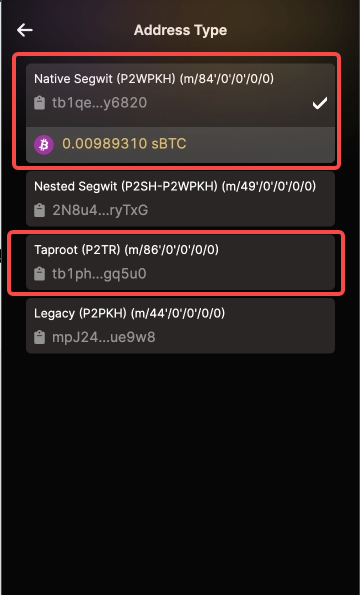
1. Connect Bitcoin Wallet - Unisat
Please note that we only support Native Segwit and Taproot address types in alpha-testnet.
2. Enter amount within `0.00001 ~ 0.0001sBTC`(Due to current liquidity constraints in our operator, we have implemented a temporary limit on amounts. We anticipate increasing these limits.)
3. Please enter the recipient's address in the designated field, ensuring it is an ERC20-compatible address from the Holesky network.
> Or just conneting with the Metamask, which will autofill the address.
4. Confirm and hit deposit
5. Sign `PEG-IN` (Deposit) Transaction and pre-sign Take Transactions, which is prepared to pay back for Operator when they finish `PEG-OUT` (withdraw) operation.
6. It will then proceed with processing.
7. Check your deposit (Peg-in) status by clicking the deposit transaction.
8. Check your bridged BTC (mamaBTC) on Sidechain wallet.
1. Add mamaBTC **`0x5636bB012F5176d75755691B623236971126Fdac`** on Metamask
2. Check the amount.
## How to `PEG-OUT`
1. Connect EVM-compatible wallets (e.g., Metamask)
2. Select `PEG-OUT` Amount (We will bring in external liquidity provider to achieve fully flexible amount in the future.)
3. Fill out the recipient address on Bitcoin.
4. Confirm and Withdraw
1. Withdraw
b. Confirm Withdraw and Sign Burn Transaction
5. Processing.
6. Check your PEG-OUT (withdraw) status in history.
> This process may take 10-20 minutes to be confirmed on the Signet.